Tuesday, April 27, 2021

My New Website is Live!

 Please visit me at seaside-stitches.com !


There is a new blog page there, but this archive will stay here.

I'm super excited about this rebranding! Let me know what you think.

Sunday, April 11, 2021

Riley's Birthday Quilt

I think temperature quilts are super fun!  If you aren't familiar with temperature quilts, the concept is to record the temperatures for every day in fabric. Makers create their own rules beyond that. Some considerations include: 

  • Pattern/block design: pieced or appliqued
  • Include high and low temps
  • Precipitation- part of the block design or embroidered
  • Month markers
  • Special days
  • Additional text: pieced, appliqued, embroidered, inked

Take a look at #tempquilt or #temperaturequilt on Instagram for a plethora of inspiration.  

Riley's quilt is the third temp quilt I've made, but the first one I'm blogging about. The first two represented the high and low temperatures for every day in 2018 and 2019.

#tempquilt2018 - 96" X 96" - 10° color ranges

 
#tempquilt2019 - 36" X 32" - 5° color ranges

When we were waiting for our first grandchild to arrive in 2020, I decided to wait until he was born to start. Here are the choices I made:

  • High temps only.
  • Pattern: I think the block looks like those toys with the beads that slide around. It takes two days to make a bead.
  • Each row equals a month. Riley was born on the 22nd, so there was a lot of negative space to fill with the pieced text.
  • I did a half-drop to create the zig zag look of the rows.
  • Used a tight palette of blues and greens. Color changes every 10° Fahrenheit. 


I used the My First Alphabet pattern by From Blank Pages for the text.


When it came time for quilting, my beloved Bernina was in the shop for maintenance, so I had to use an unfamiliar machine. I couldn't get the stitch right for free motion, so I had to stick with straight lines with the walking foot. I had fun with some point-to-point work. I'm happy with the resulting texture. 


The label had to include the temperature ranges so I used some extra units to piece a big block. I pieced the back with leftover fabric from the front and a big piece of leafy print that I thought I might add as a border. I'm glad I left it off. It's big enough for our little guy.


Without a border, the binding needed a little something extra, and I do love a flange!


Riley's 1st Year
47" X 60" 
started April 2020
completed April 2021

Monday, March 8, 2021

Quilted Placemats

Buona festa della donna! (Happy International Women's Day!) 


 I just finished six quilted placemats for my sister. When she saw the ones I made for myself last summer, she asked for a set. Here are three of my six. We've used them almost every day since July, they've been washed a bunch of times, and still look great. They are improv pieced from scraps, which I find extremely entertaining. The straight parallel quilting lines hold everything together nicely.

 
 Here is Anita's set. She loves neutrals. I was able to use some of the fabrics that were left over from the lap quilt I made for her a few years ago.

When she saw on Instagram that I had started working on them, she was surprised they made it to the top of the queue, but the project perfectly fits #sewthescrapoutofMarch. 
 
Here's my set up. Cutting mat, spray bottle and starch far left, then wool pressing mat and travel iron.

I do all my piecing on my antique Featherweight. The bin of scraps is handy, as is a 16 oz tumbler of water. Stay hydrated, my friends!

I killed my Bernina 153 last week. I have neglected her for so long that she seized up on me! Keep your machines hydrated (oiled) too! She'll be dropped off at the spa later this week. In the meantime, I'm using the used Bernina 200 that I picked up for Julia. I don't love it, but the automatic thread cutter was very helpful! No one can take the place of my 153 except maybe a 770. ; )

  It took me a minute to find them, but I did remember to include my labels. The binding is completely machine-stitched for durability.

 I don't know if you want to see each one, but here they are. I added some cute prints for her grandchildren in the first two.


Quilted Placemats for Anita
14" X 18"
Started 3/4/2021
Completed 3/7/2021

Friday, March 5, 2021

Intriguing Interleaves

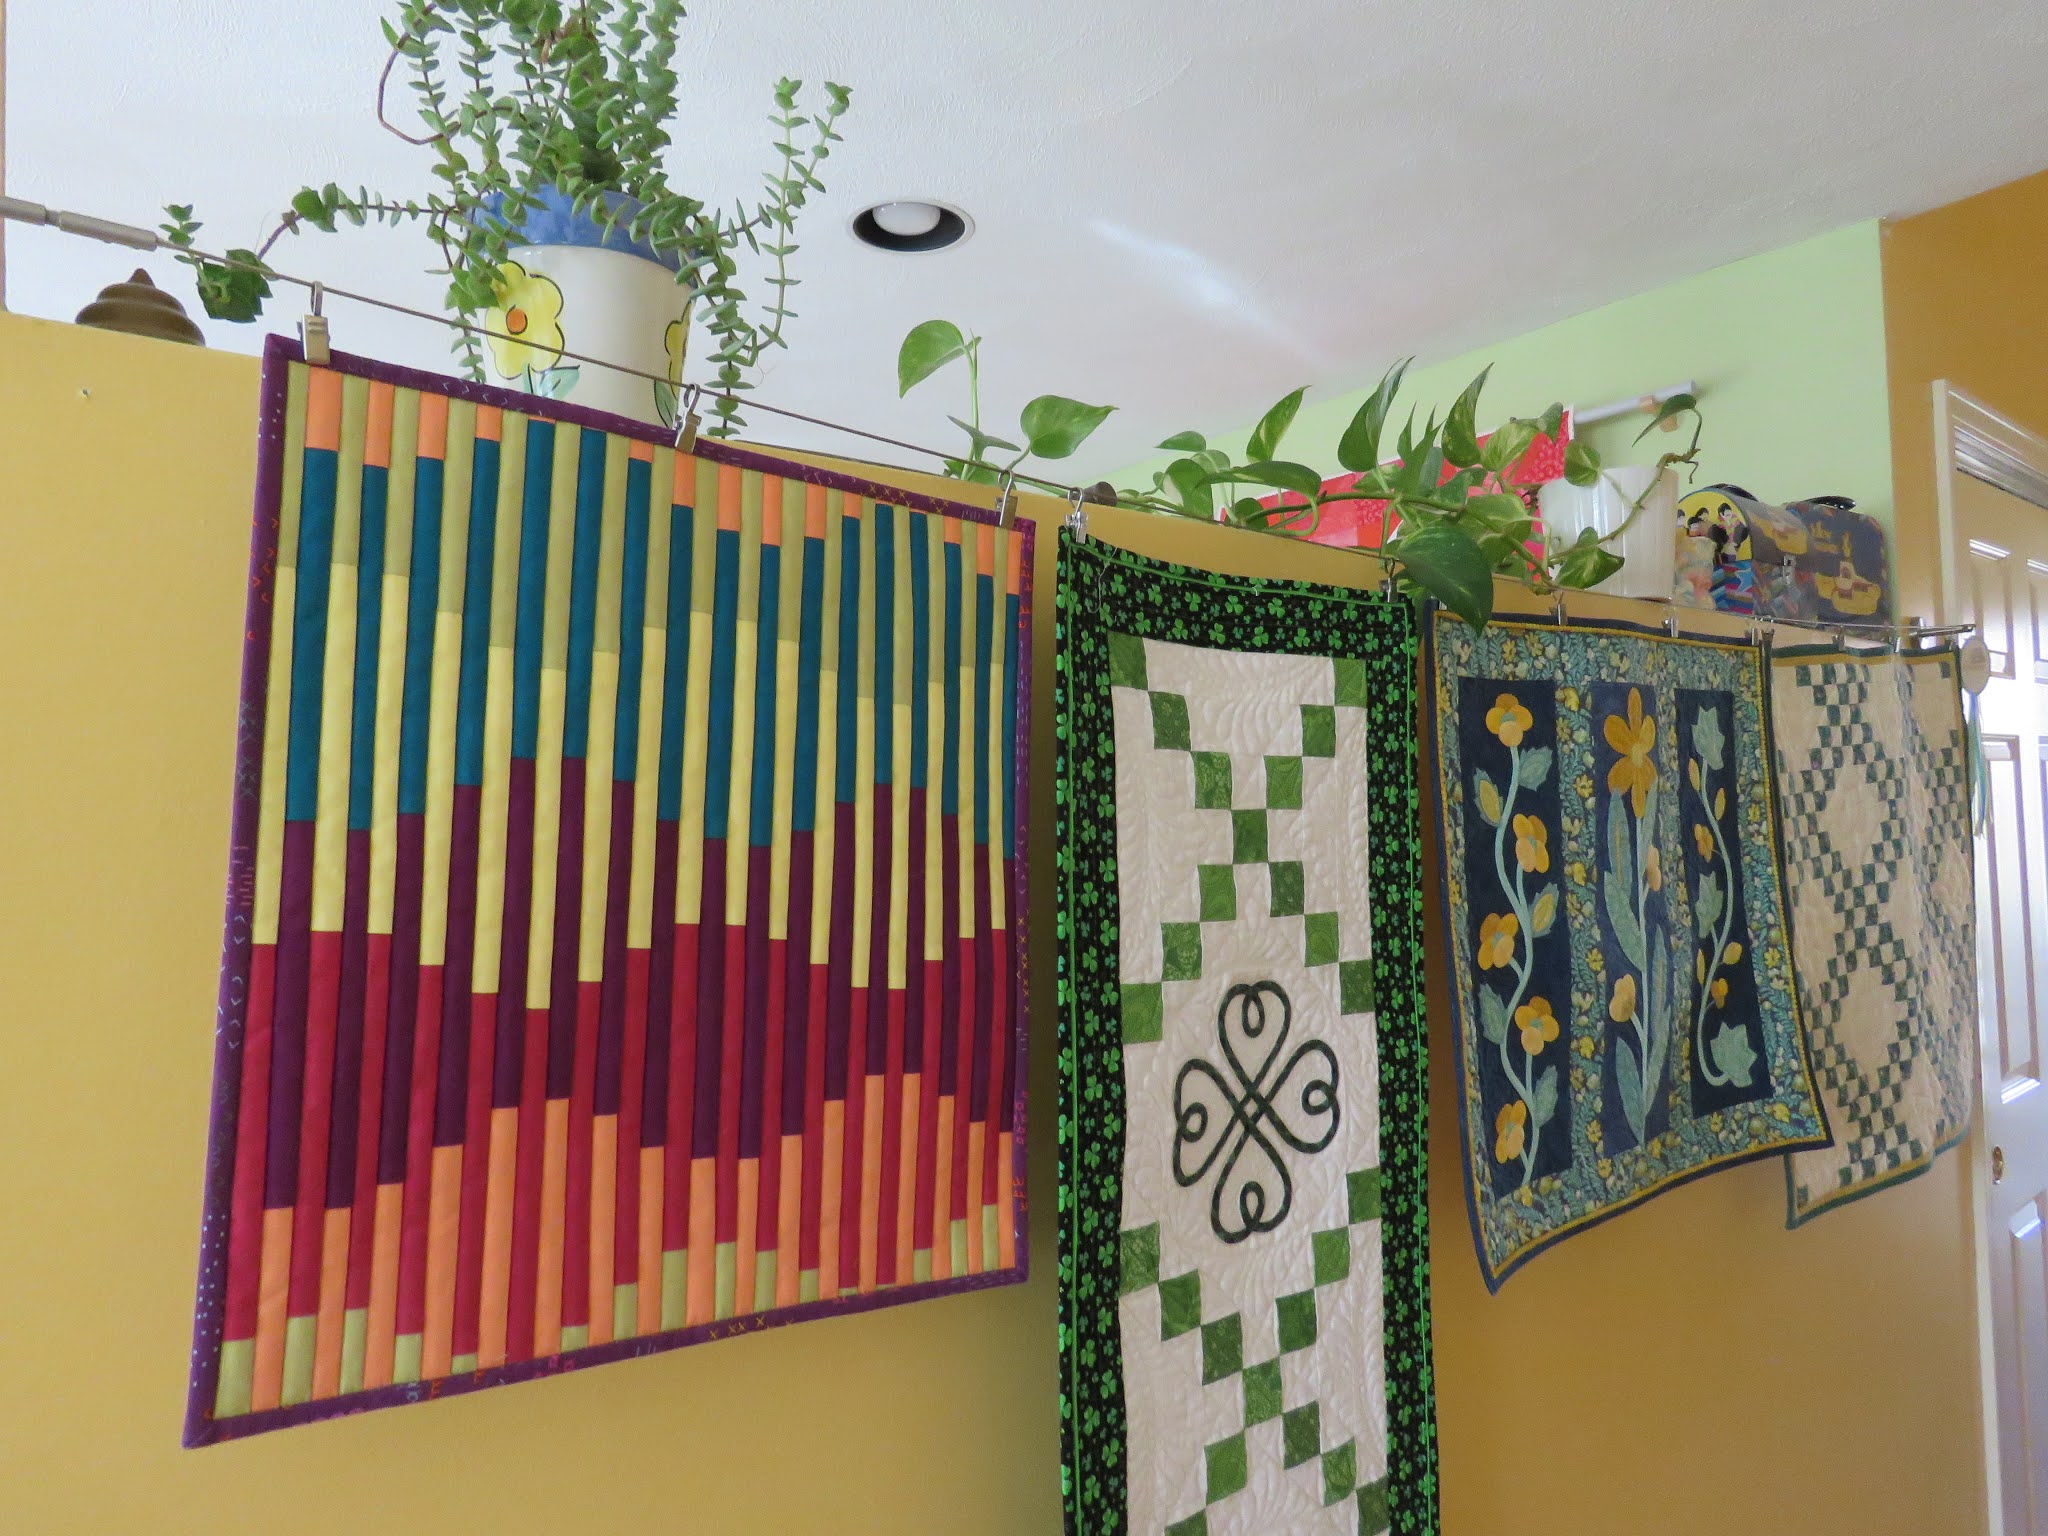
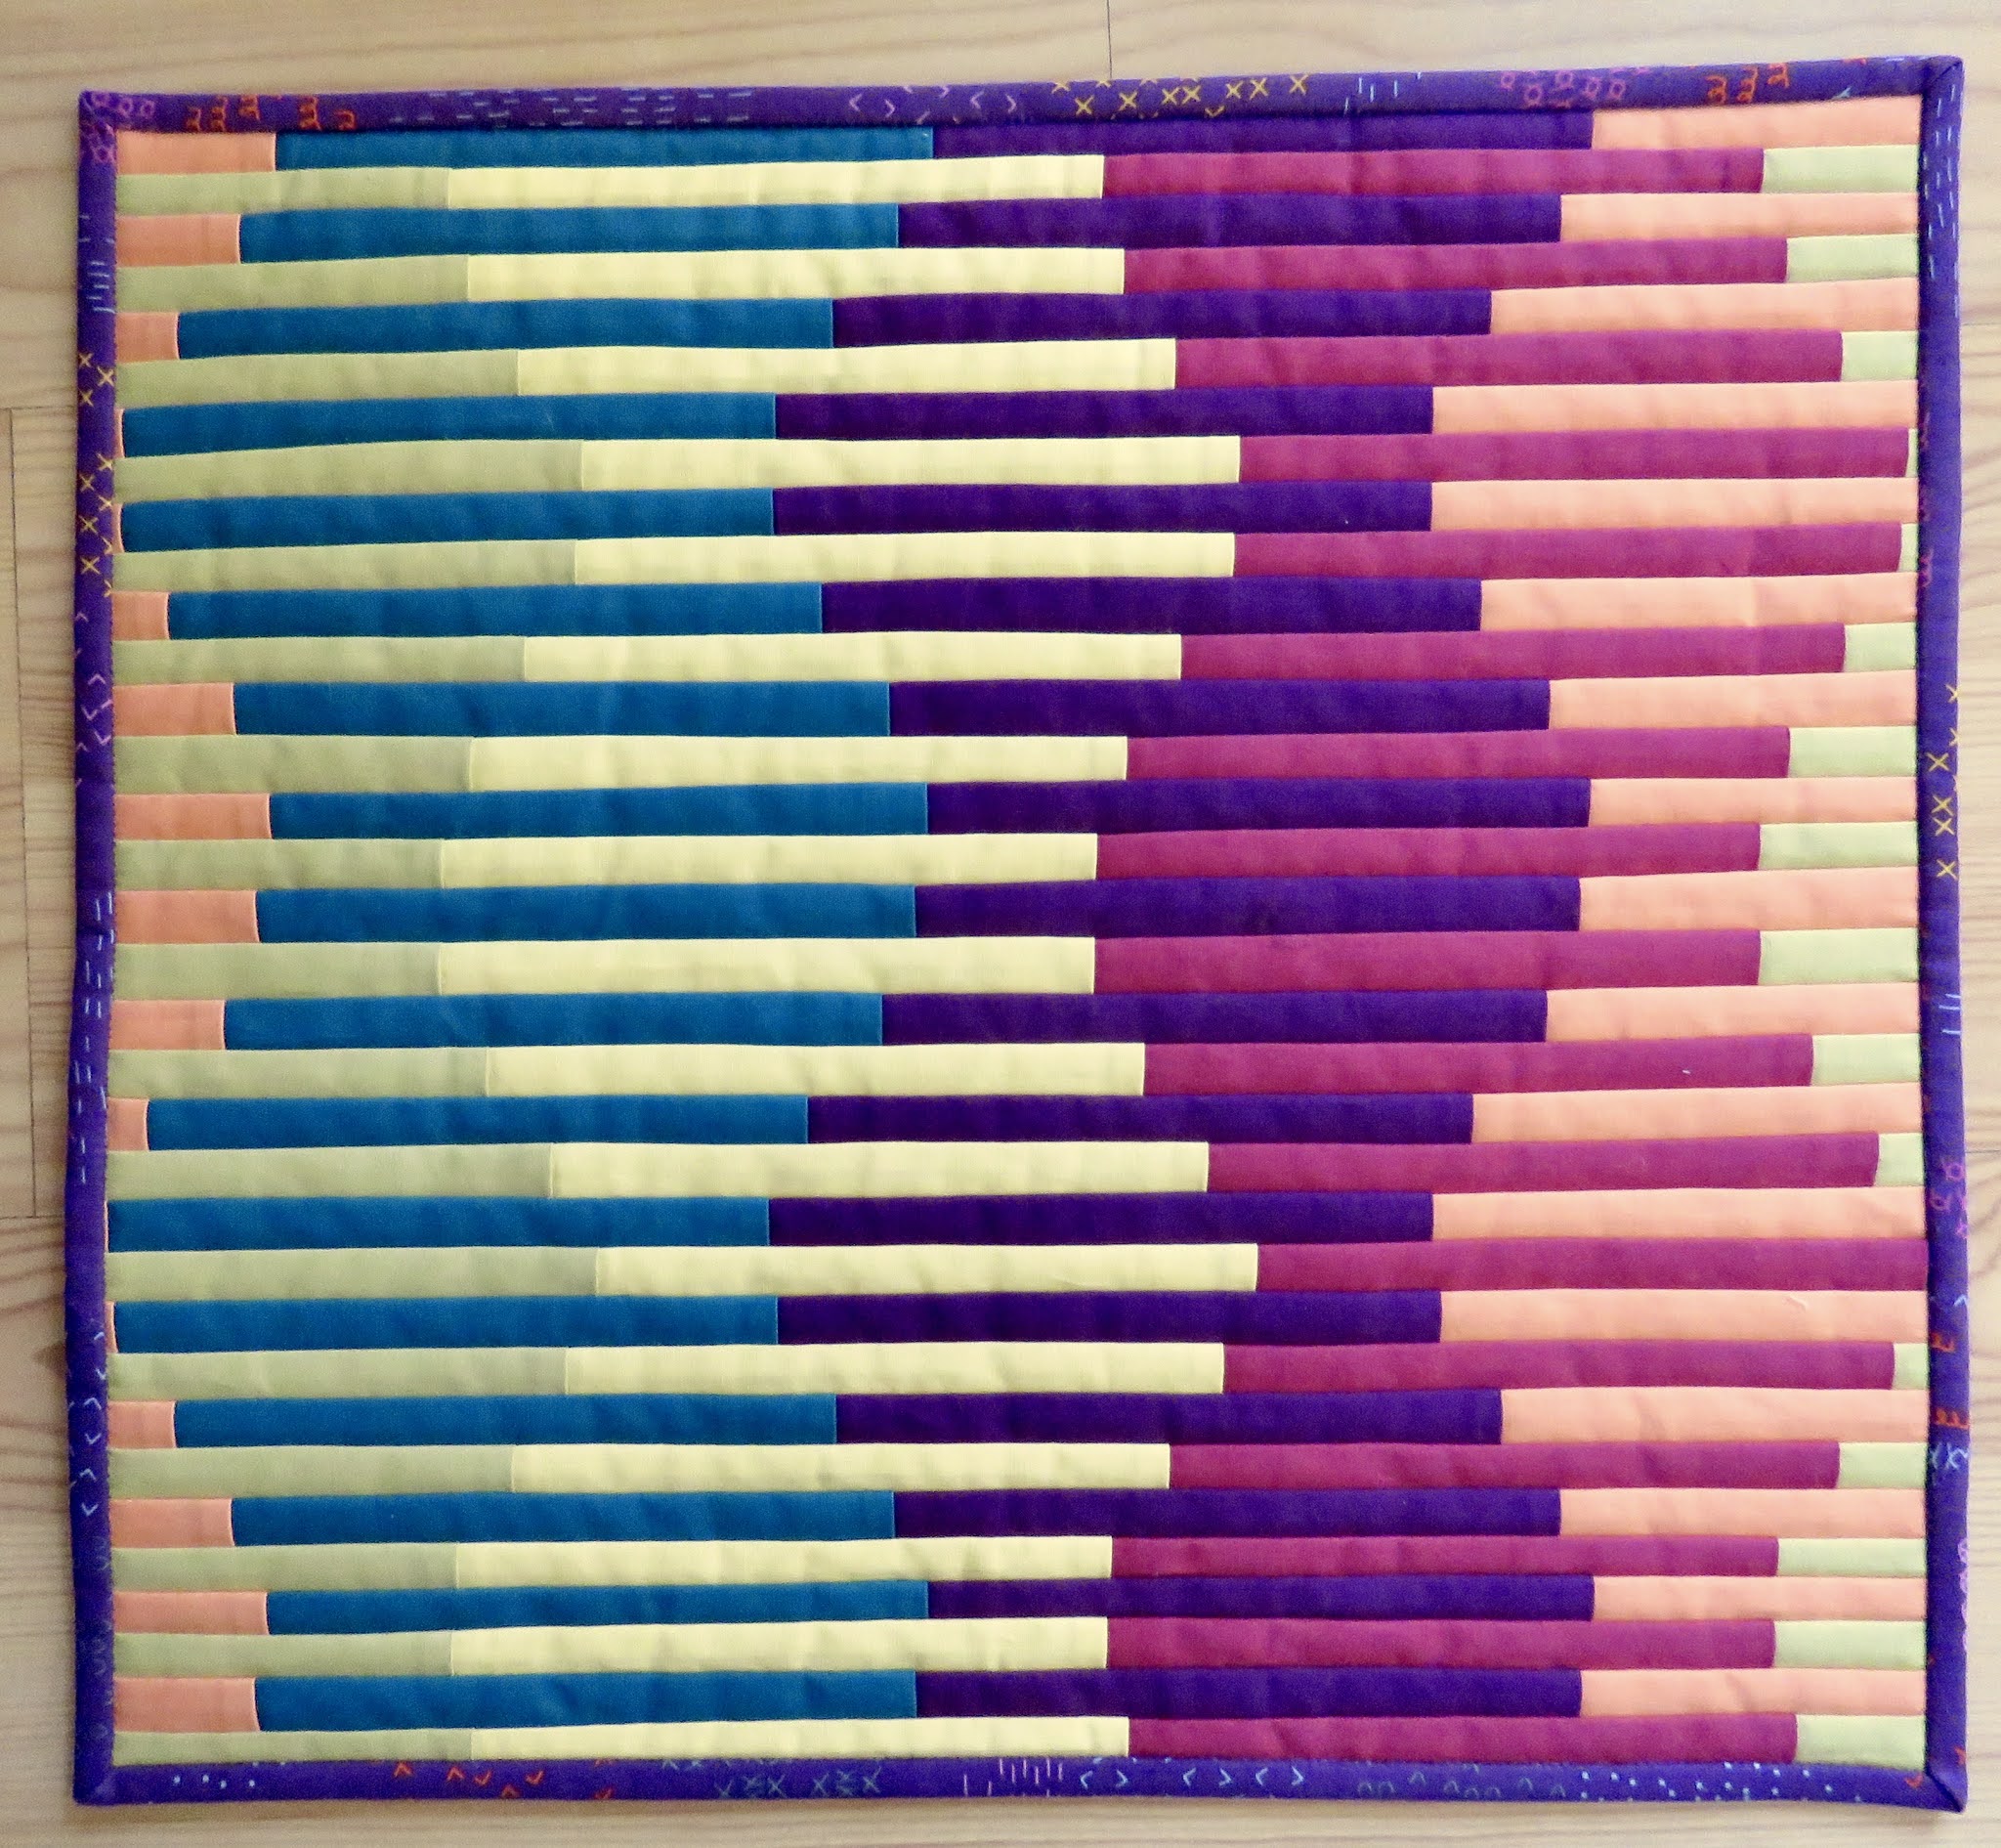
What a fun workshop this was! Mel Beach taught Intriguing Interleaves to Ninigret Quilters via Zoom in February. It is a quilt-as-you-go method, which means when the piecing is done, so is the quilting! How satisfying to have a completed project so soon after taking a class, and not another UFO for the pile!


Mel is an outstanding teacher who utilizes all the technology at her disposal to maximize student engagement in the virtual environment. She's the best we've seen since we started Zooming in April 2020.

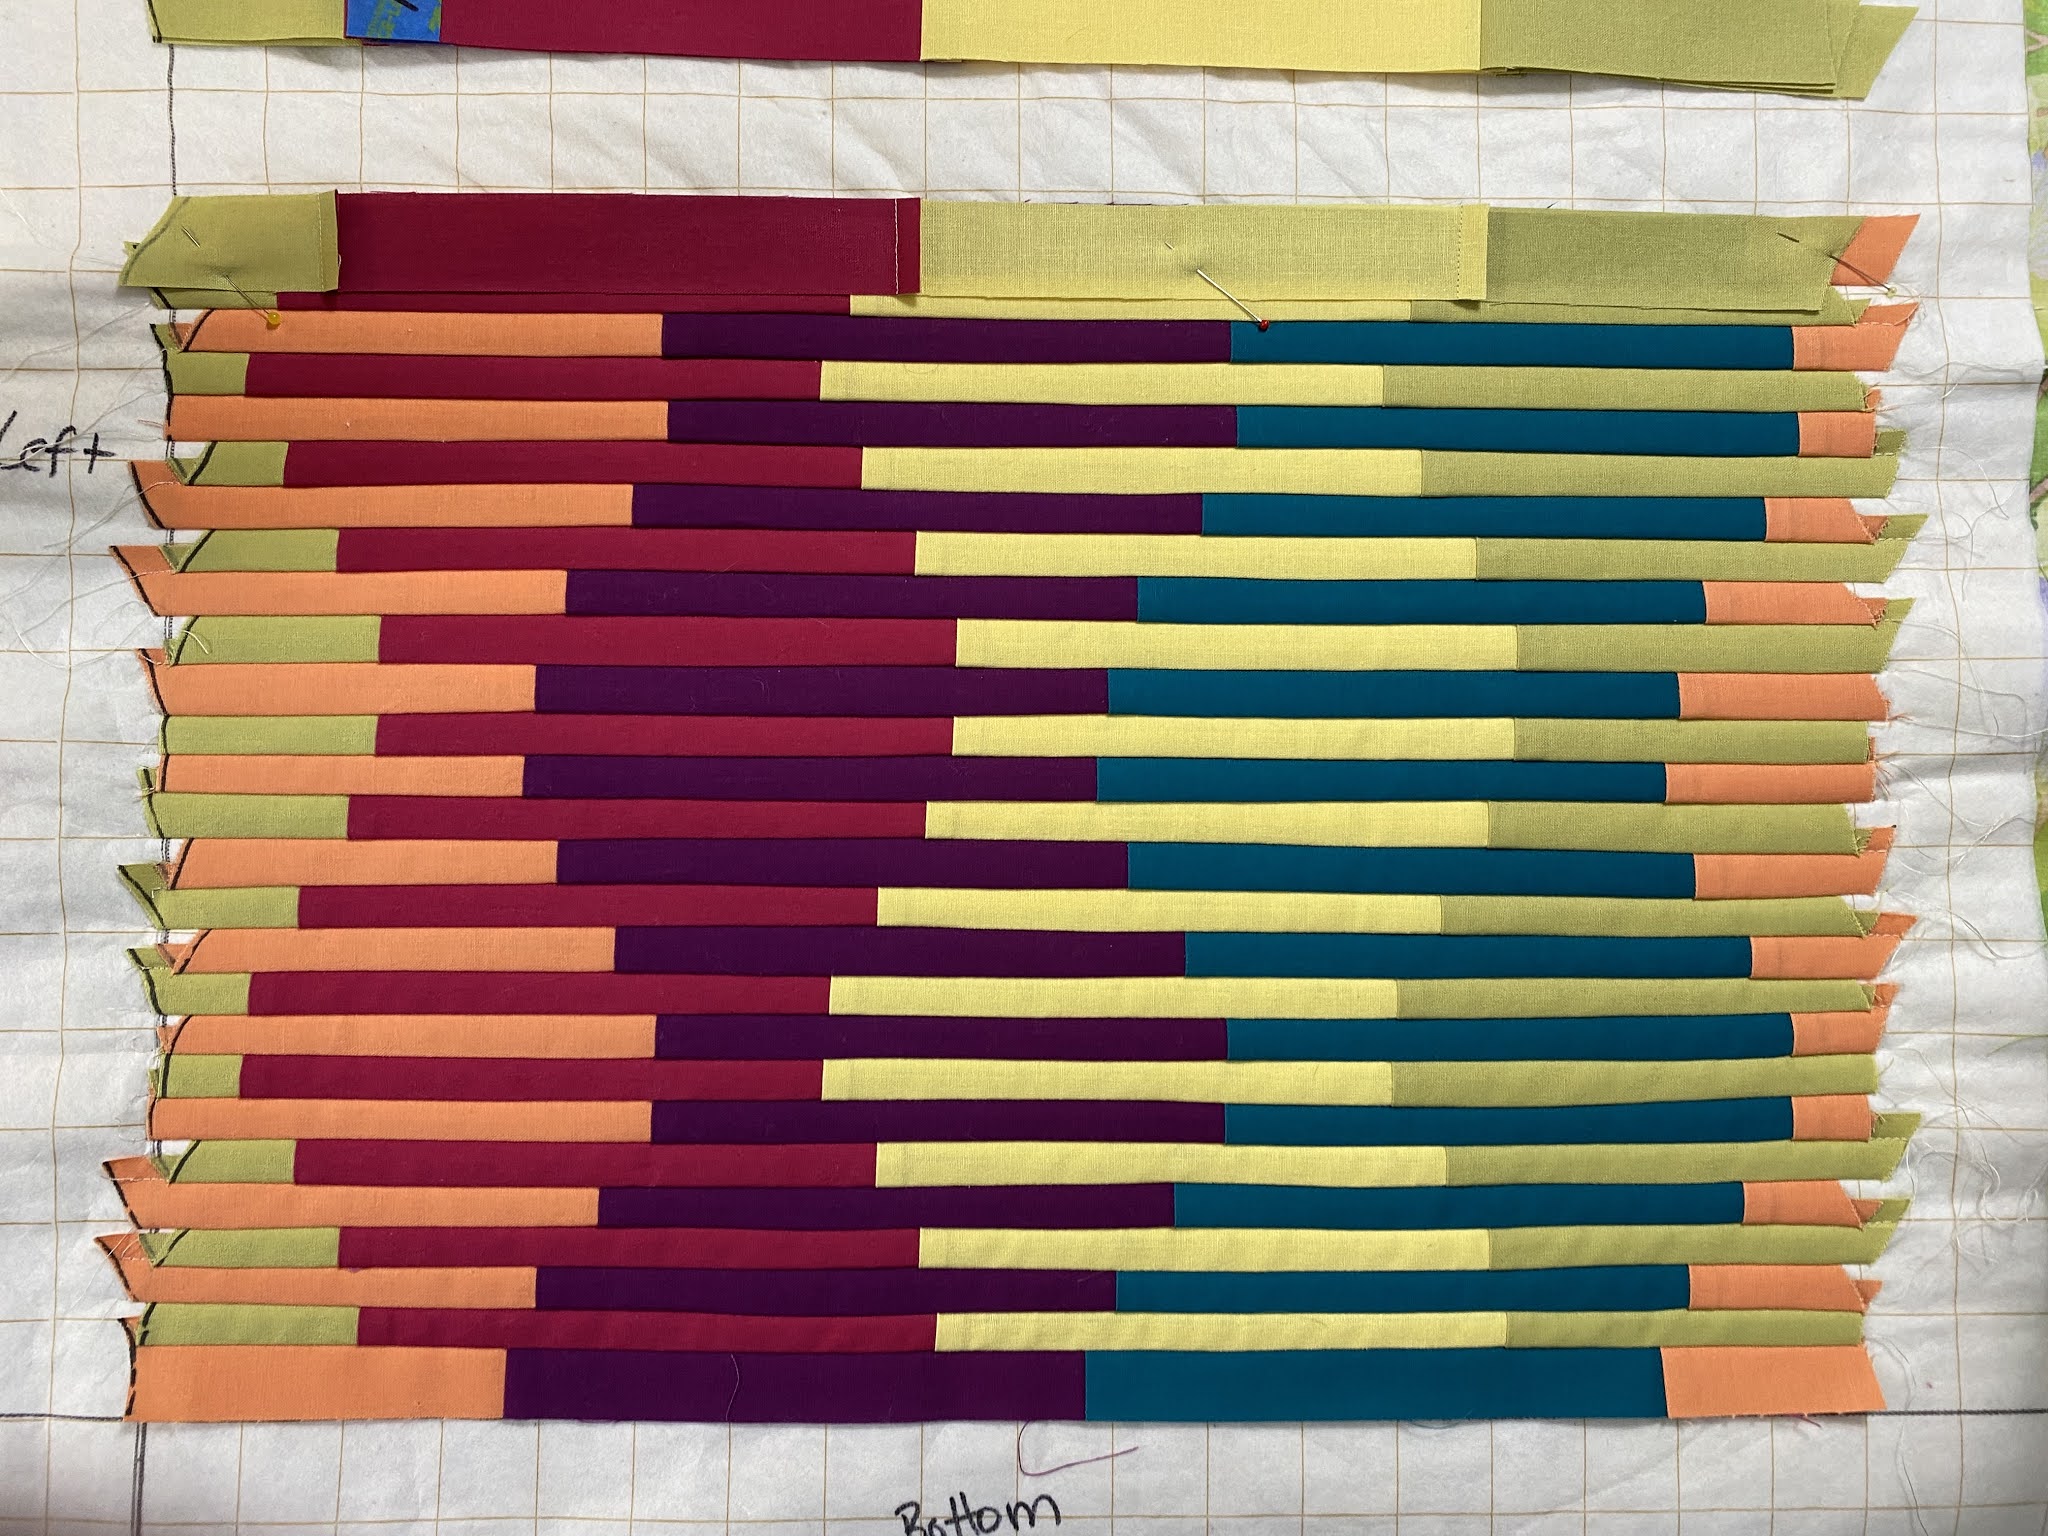
I'm not going to get into the process here, but here are a couple of process pics. Above, you can see the six fabrics I started with. One strip set was blue-purple-orange and the other was green-yellow-raspberry. I used a mirrored sine wave to cut my curves. Below, you can see the interleaves starting to form. You can take a look at Lorrie Cranor's tutorial.

 The binding went on after the second class session. I added corner pockets for hanging so I can hang it any which way. The label is handwritten on the bottom corner. I had just enough of that gorgeous lotus print for the back.


For now, it's hanging in my hallway gallery.

 
I thought the mottled sunlight was pretty this morning. 
 

My daughter's dog needs to test out every quilt, no matter how small. He refuses to look at a camera!


This is my favorite shot!


 Intriguing Interleaves
by Tina Craig
16" X 17"
Started 2/13/2021
Completed 2/27/2021
Workshop with Mel Beach and Ninigret Quilters
 

Thursday, March 4, 2021

Celtic Shamrocks

 I made a table runner and I'm blogging about it within 24 hours!

  After a successful Celtic applique workshop with Scarlett Rose in January with Ninigret Quilters, I went all in on Celtic! There's a big, beautiful Valentine wall hanging that is on hiatus. I wanted to practice quilting on something less important, so I started this shamrock piece.
 
I drafted this design in EQ8 by tracing some stock Celtic drawings I found online. The block finishes at 7.5", which was pretty small for those inside loops, even with 1/4" bias. Playing with plaid was fun!
 
 
After some very basic quilting (straight lines and tight echo around the applique), I thought I might be done. Well, that wouldn't meet my goal of practicing, so I stitched on.

Before and After
 
I dove head first into free-form feathers! I used to tell myself that I stink at feathers. I wasn't getting any better with that attitude and no practice! I used Lisa H Calle's ProEcho 11 ruler to form the veins. I watched a bunch of videos on how to form the feathers. Then I drew a bunch on a dry erase board until I felt like I had the shapes and motions down. Then I started stitching. I'm thrilled with the results!
 
 
I stitches the side triangles first, then filled in around the applique. I quilted the snot out of it!


Check it out! I don't stink at feathers after all!

 
 I love a flange binding! This runner was not particularly square or flat when I started quilting. It got a little better, but still isn't perfect. Done is better than perfect! I know I can make a perfect binding when I need to.
 

This piece will be a nice decoration for March and a great lecture/teaching piece. Suzanne at the sew-op has already requested that I start teaching Celtic applique in the shop! I'll be sure to let you know when I emerge from my bubble.


 "Celtic Shamrocks"
by Tina Craig 
14" X 43"
started 2/24/2021
completed 3/4/2021
Hand appliqued, machine pieced.
Quilted on Bernina 153 with walking foot, ruler work and free motion.

Saturday, January 2, 2021

Safari Tango

 My last finished quilt of 2020 is called Safari Tango. It might be the first true double-sided quilt I've ever made. The front was started in an online (Zoom) workshop with Diane Harris, The Stash Bandit, hosted by Ninigret Quilters. She calls her pattern Twofer Tango because you could get two quilts from your effort. The half square triangle units are bonus blocks from the creation of the main X-blocks. I chose to add mine around the border instead of harboring yet another UFO!


The back of the quilt was one of those long-simmering UFOs. Started in a class with Thomas Knauer in 2015, also hosted by Ninigret Quilters, it is a code quilt with the word SAFARI spelled out in Braille and repeated in a loop.


Both sides of the quilt used fabric that was purchased by Julia and me in Tanzania in 2014. The background print on the front was a big chunk of fabric from Joann's that came to me from someone else's stash. It is a grass-like print which was perfect since Julia's research project that semester in Tanzania dealt with grasses in the Ngorongoro Crater.


Quilting is all fun and games until you stitch onto a glove. I might have had better luck if I had remembered to drop the feed dogs!


Safari Tango
60" X 86"
Safari started in 2015 
Tango started 10/17/2020
Completed 12/30/2020